Carburetor Disassembly
SAFETY FIRST: Protective gloves and eyewear are recommended at this point.
NOTE: Always wear safety glasses when using compressed air and never point it directly at yourself or anyone else.
Remove the carburetors. See the Carburetor Removal topic for more information.
Note: The carburetors on the 1988 - 1989 Katana 600 are somewhat different from the others model. The differences will be noted.


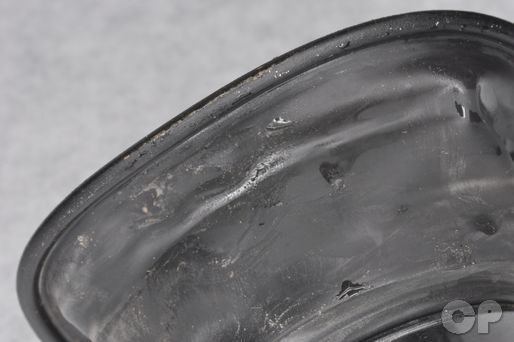
Inspect the hoses for damage and deterioration.
Remove the two air vent hoses.


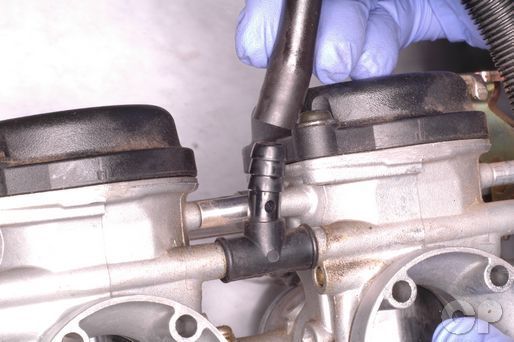
Squeeze the fuel line clamp with pliers and slide it back. Free the fuel line from the carburetors.
Remove the fuel hose/s and the vacuum line/s.
Choke


Slide back the plastic clips from the choke side.
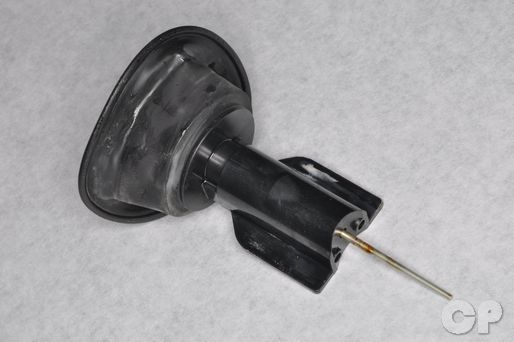
Remove the choke slide from the carburetors.
Note: The carburetors on the 1988 - 1989 Katana 600 are different from the others model. They early 600 carburetors do not have a cable actuated choke, but a plunger knob on the right side.
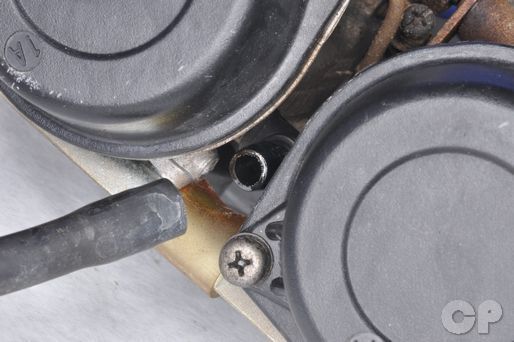
To remove the choke plunger knob and slide loosen the four screws with a #2 Phillips screwdriver. It may be necessary to use an impact driver. The screws should be replaced if removed.
Remove out the choke plunger and slide from the right side of the carburetors.


Remove the choke holder.


Take out the spring and choke plunger. Clean and inspect the plunger for wear and damage.
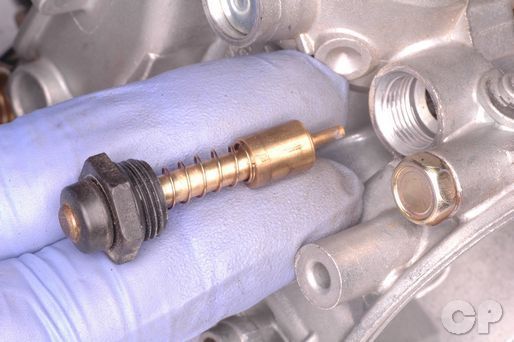
The choke is holder is threaded on the 1988 - 1989 Katana 600 models. Remove the choke plunger with a 14 mm socket.
Vacuum Piston and Jet Needle


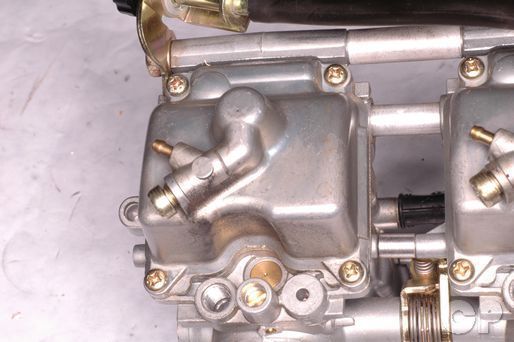
Remove the diaphragm cap screws with a #2 Phillips screwdriver. There are two screws on the 750 and 1990 - 1997 600 Katana models, and four screws on the 1988 - 1989 600 Katanas.


Remove the diaphragm cap and spring.


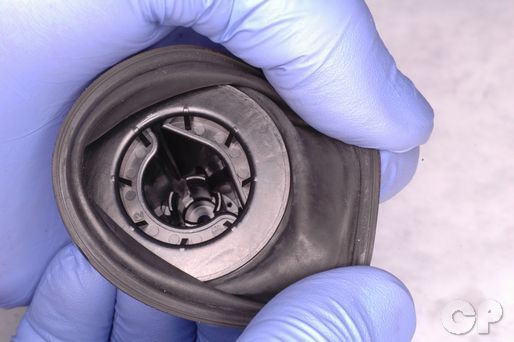
Lift the diaphragm and piston out from the top of the carburetor.


Remove the vacuum chamber O-ring from the top of the carburetor.
Inspect the piston and needle for wear, damage, and grime.
Inspect the diaphragm for damage. Replace the diaphragm if it is punctured or torn.


Lift out the spring seat and the jet needle.


Lift the jet needle out of the piston valve. Remove the clip and spacer from the needle.
Inspect the jet needle components for damage and wear. Replace the components as needed. Clean the parts with a high flash-point solvent.
Inspect the diaphragm and piston valve for wear and damage. Replace the diaphragm if it is punctured or torn.
Float Bowl and Jets


Remove the float bowl screws with a #2 Phillips screwdriver. The 750 and the 1990 - 1997 600 Katana models have two screws per float bowl.


Each float bowl has four screws on the 1988 - 1989 Katana 600 models. Remove the four screws from the float bowl with a #2 Phillips screwdriver.
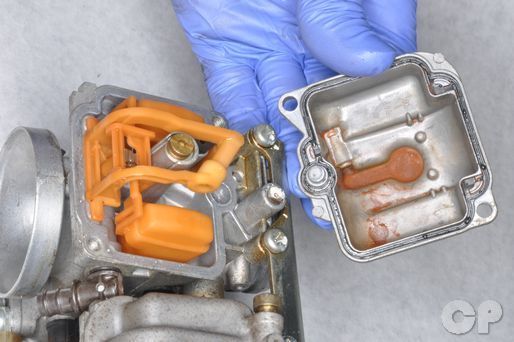


Lift off the float bowl. The float bowl seal should be replaced with a new item. Discard the old seal.


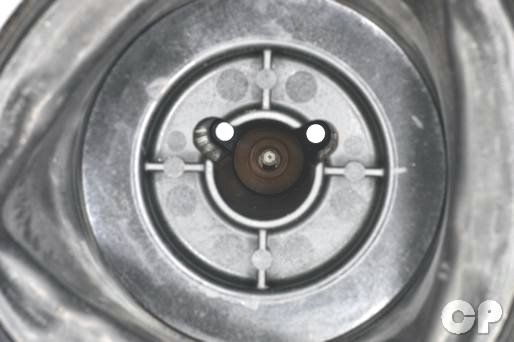
Check the float height with a float height gauge as shown in the above photo. The gauge should be even with the main jet. You can also use a machinists rule or caliper. Hold the carburetor so the float tang is resting on the spring loaded plunger in the float valve, but does not compress it. Measure the distance from the float bowl mating surface and the highest point on the float. Compare your reading with specification.
| Float height | 14.6 ± 1 mm (0.57 ± 0.04 in) |
If the float height is out of specification remove the float valve needle and bend the tang on the floats until the float height is within specification.


Remove the float assembly. Replace the floats if they are damaged or if there is gas inside of them.
The 750 and the 1990 - 1997 600 Katana models have a single unit float and float valve that cannot be disassembled. Remove the two O-rings. Clean the float assembly with a high flash-point solvent and compressed air. Check the movement of the float valve in its orifice. The valve shouldn't stick and its plunger pushes in and springs back freely.
NOTE: Always wear safety glasses when using compressed air and never point it directly at yourself or anyone else.


On the 1988 - 1989 Katana 600 models remove the float valve needle from the tang on the floats. Replace the floats if they are damaged or if there is gas inside of them.


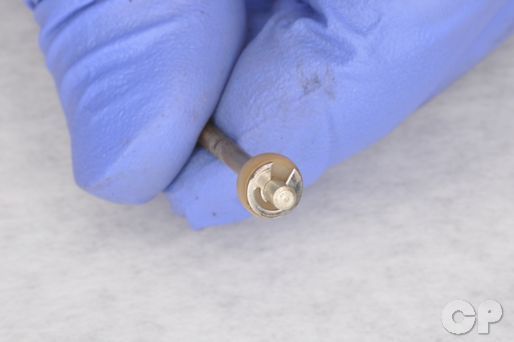
Inspect the float valve for wear or damage to the rubber tip. Replace the valve if it develops a stepped wear ring on the tip. Make sure the plunger on the other end pushes in and springs back freely.


The float valve orifice is a separate piece on the 1988 - 1989 Katana 600 models. Remove the float valve orifice set screw with a #2 Phillips screwdriver.


Pull out the float valve orifice with pliers. Do not damage the inside of the orifice. Inspect the valve orifice for damage and wear. Clean the orifice with a high flash-point solvent and replace its O-ring with a new item.
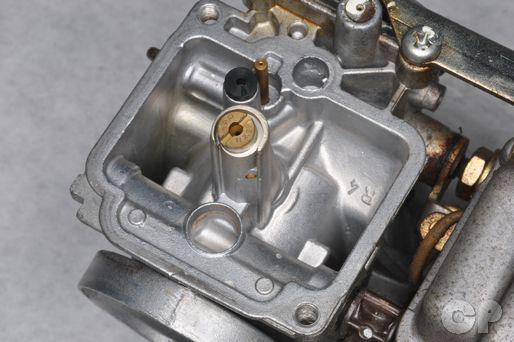


Remove the main jet with a flat blade screwdriver. Be gentle when the jets and the pilot screw because they are made of soft metal. Keep track of the location of the main jets if multiple carburetors are being disassembled. The size of the main jet changes by the carburetor on some models.
There is a washer that sits under the main jet on the 1988 - 1989 Katana 600 models.


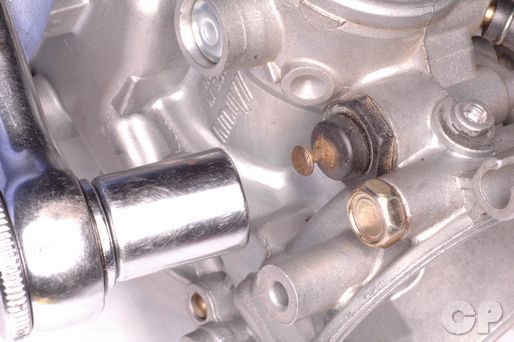
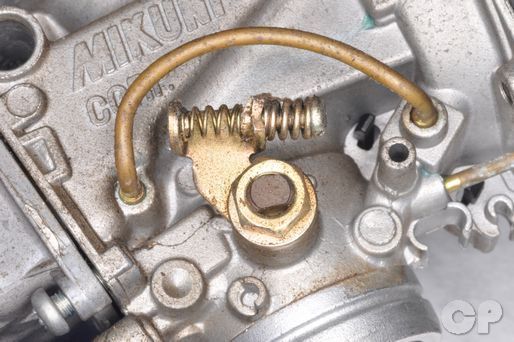
Remove the pilot screw plug on the 750 and the 1990 - 1997 600 Katana models.


Remove the pilot jet with a small flat blade screwdriver.


Remove the needle jet from the top of the carburetor.
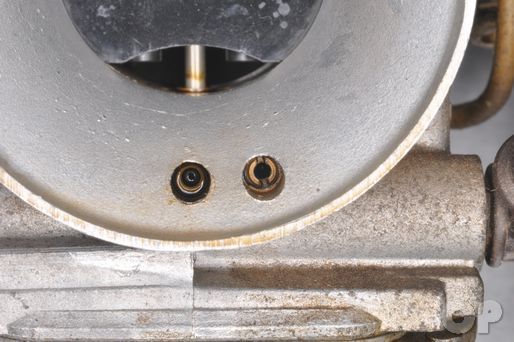
The main air jet is located on the mouth of the carburetor on the 750 and the 1990 - 1997 600 Katana models. On the 1988 - 1989 Katana 600 models the main air jet sits in the top of the carburetor under the diaphragm.


Remove the pilot air jet with a small flat blade screwdriver. Do not try to remove the main air jet. The main air jet is pressed in and cannot be removed without damaging it.
Pilot Screw
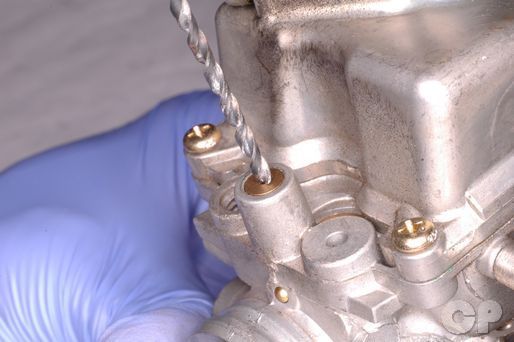
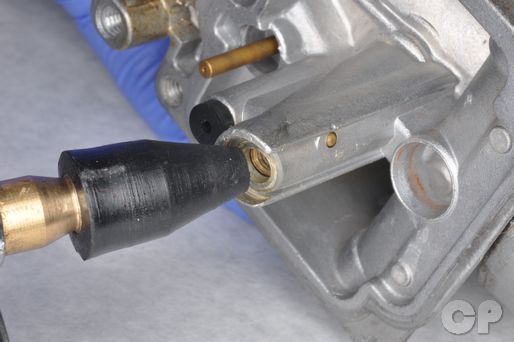
If you need to access the pilot screw you must remove its plug. Use a drill bit of around 1/8 in with a drill stop. Temporarily install the float bowl to keep debris from falling directly into the carburetor. Drill 6 mm into the plug.


Do not continue drilling or you will damage the pilot screw. Thread a self tapping screw into the plug and pull it out. Clean any metal shavings from the area.

You now have access to the pilot screw. Before removing the screw, or adjusting it check its current setting. Turn the screw in, while counting your turns, until it seats lightly. Record this number of turns.
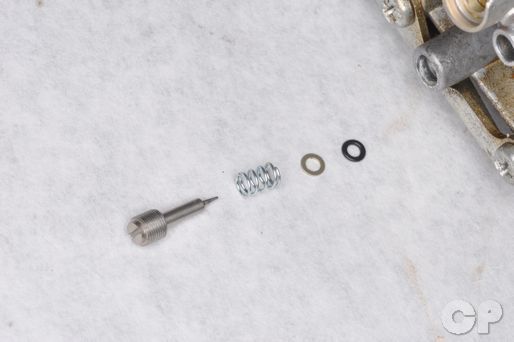
Remove the pilot screw, spring, spring seat, and O-ring.
Throttle Valve
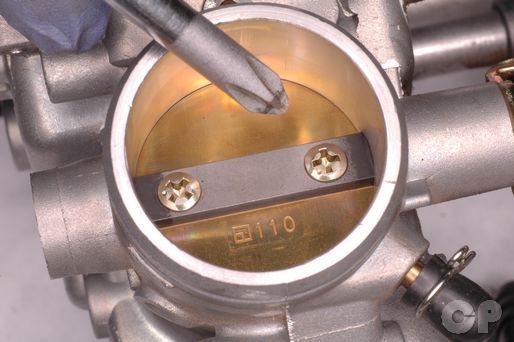 If you need to remove the throttle valve loosen the two screws with a #2 Philips screwdriver. The screws must be replaced if removed.
Cleaning
Clean out the passages in the carburetor and the float bowl with an aerosol carburetor cleaner and/or compressed air. If necessary use a soft pipe cleaner, but never use a wire.


Hold all of the jets up to a light, you should see a clear, round opening. Clean any jets that are blocked or restricted using aerosol carburetor cleaner and/or compressed air. Do not clean jets with wire. Replace the jets if they are damaged.
NOTE: Always wear safety glasses when using compressed air and never point it directly at yourself or anyone else.
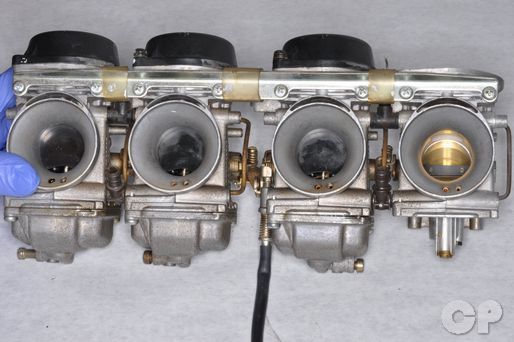
Splitting


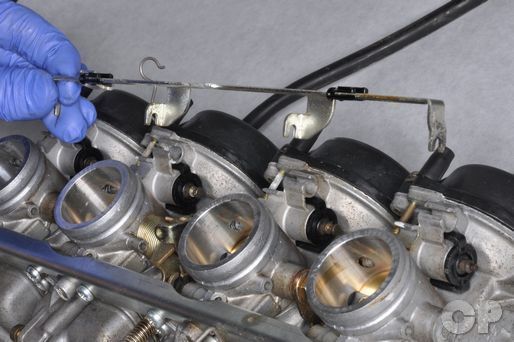
Free the idle adjuster from its stay on the left carburetor.
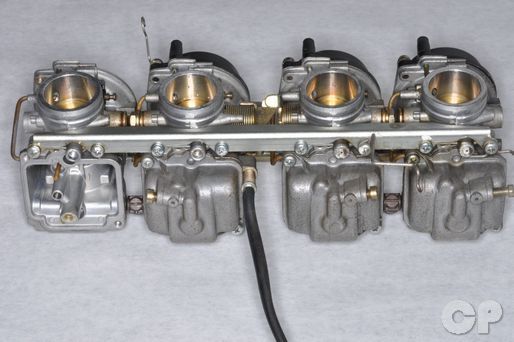


Loosen the lower set plate screws with a #2 Phillips screwdriver. Remove the screws and the idle adjuster stay.
Remove the lower set plate.


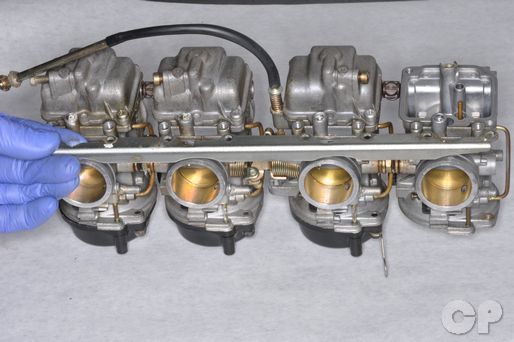
Remove the upper set plate screws with a #2 Phillips screwdriver.
On the 1988 - 1989 Katana 600 models slide back the clamps on the fuel lines that run between the carburetors.
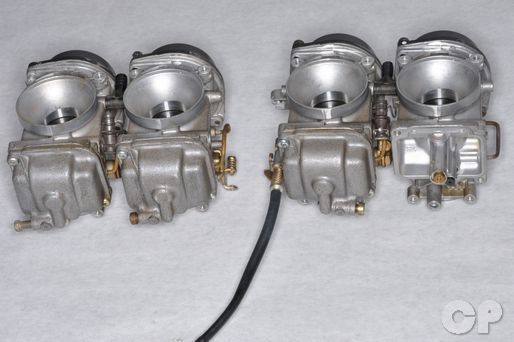
Split the carburetors into pairs on the 750 and the 1990 - 1997 600 Katana models.

Gently pull the carburetors apart.
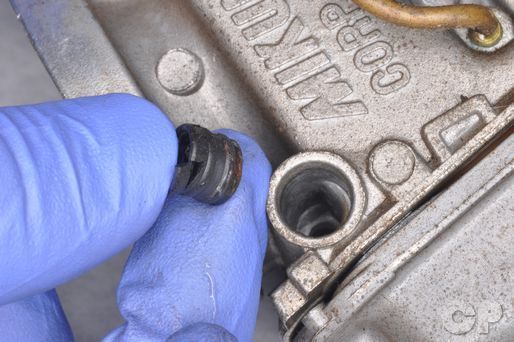
Remove the rubber seals between the carburetors. Discard the rubber seals and replace them with new items at assembly.
Inspect the starter pipes for damage and leaks.
To assemble the carburetor see the Carburetor Assembly topic.
Copyright 2025 - Cyclepedia Press LLC

Note: If you are viewing this document offline be sure to visit the latest version online at http://www.cyclepedia.com before attempting any repairs. Updates are made without notice.